Machine Learning
Implementing a Siamese Network
A beginner-friendly implementation guide.

Avi Chawla
A beginner-friendly implementation guide.

TODAY'S ISSUE
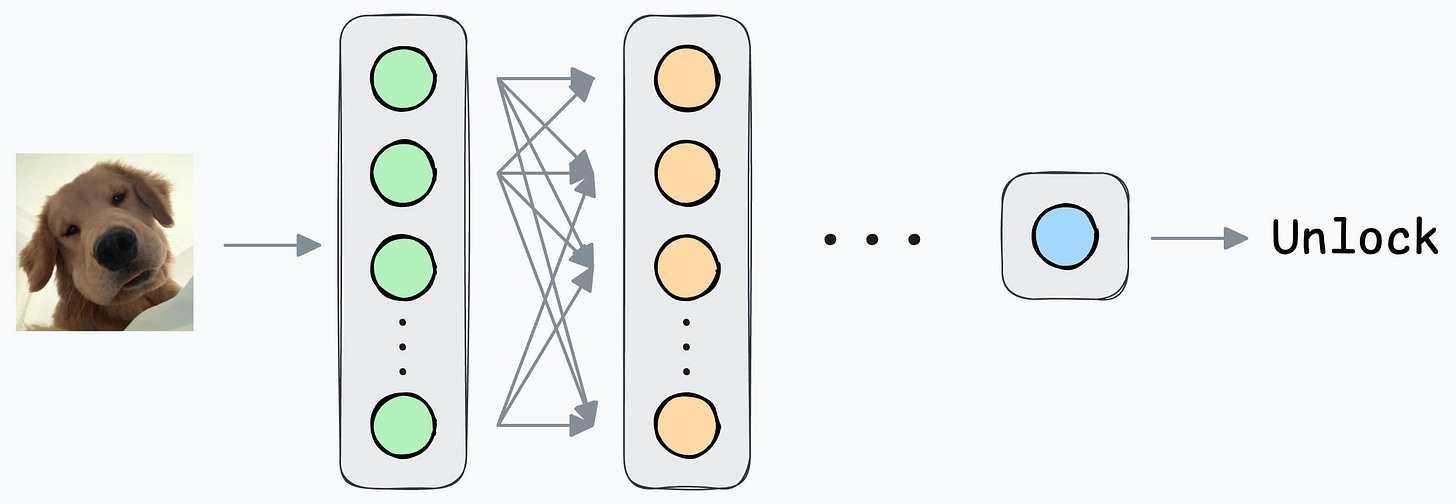
In yesterday’s issue, we learned how a Siamese network trained using contrastive loss can help us build a face unlock system.
Today, let’s understand the implementation.
If you haven’t read yesterday’s issue, I highly recommend it before reading ahead. It will help you understand the true motivation behind WHY we are using it:

Here’s a quick recap of the overall idea:
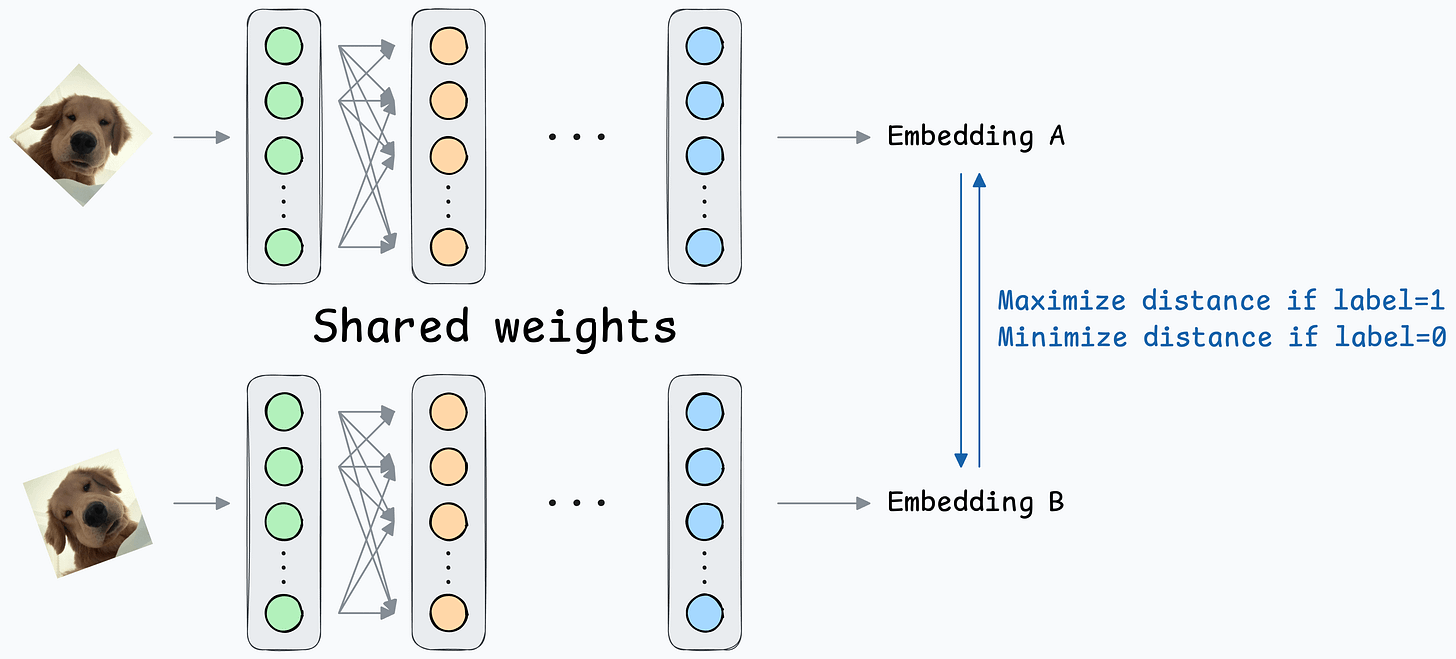
Next, define a network like this:
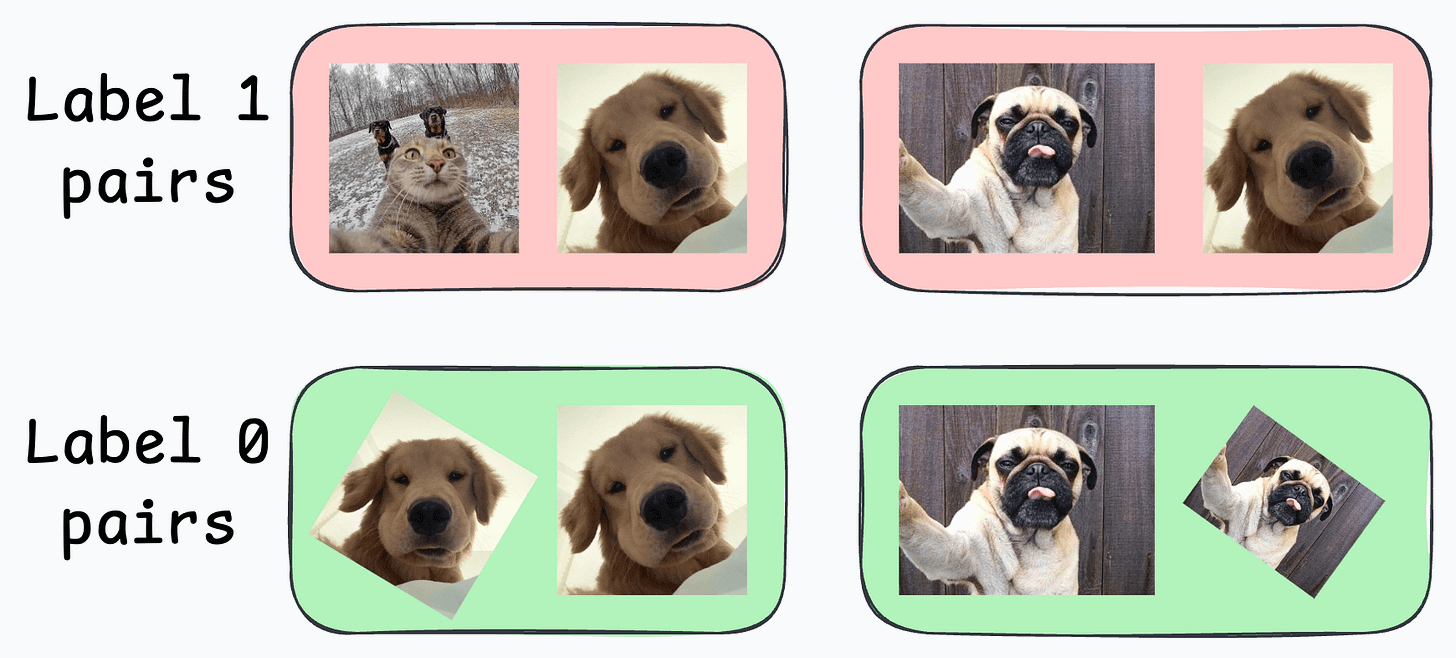
Create a dataset of face pairs:
Contrastive loss (defined below) helps us train such a model:

where:
y is the true label.D is the distance between two embeddings.margin is a hyperparameter, typically greater than 1.Next, let’s look at the implementation of this model.
For simplicity, we shall begin with a simple implementation utilizing the MNIST dataset. In a future issue, we shall explore the face unlock model.
Let’s implement it.
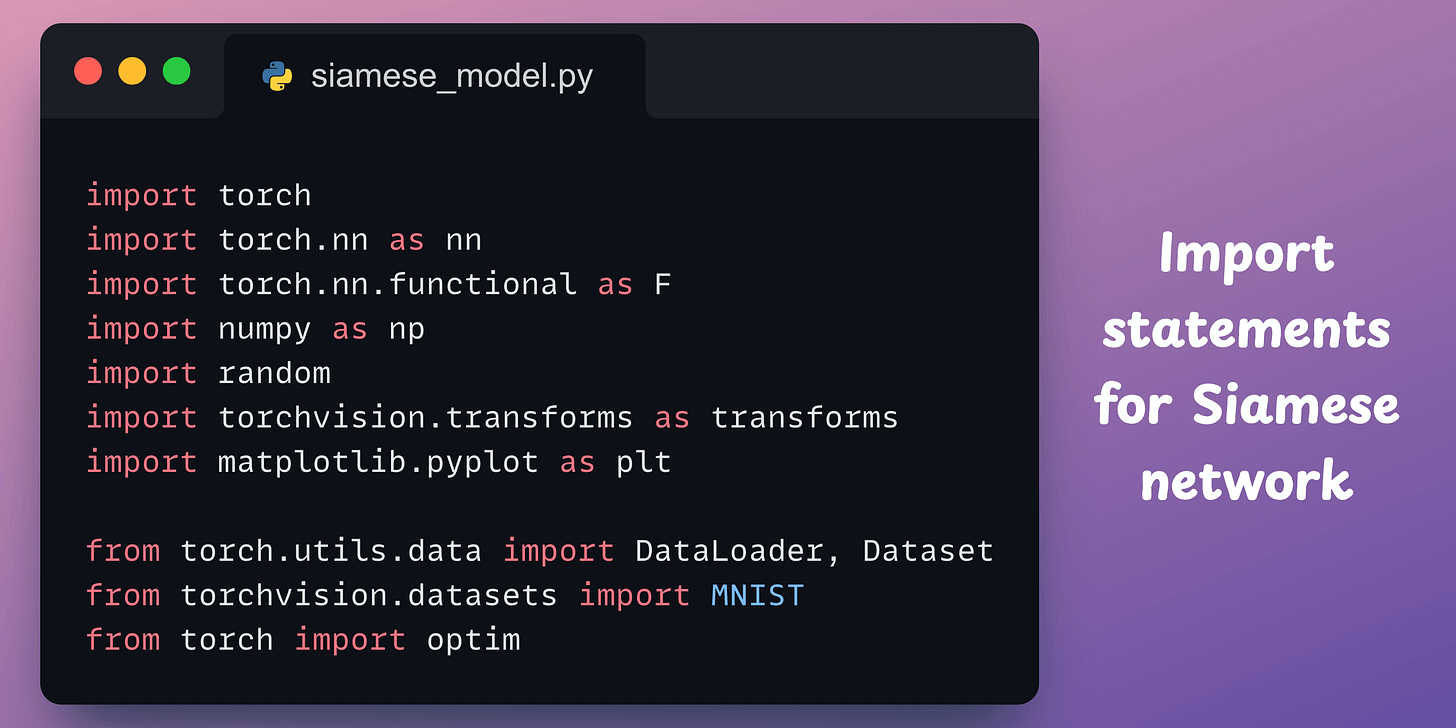
As always, we start with some standard imports:
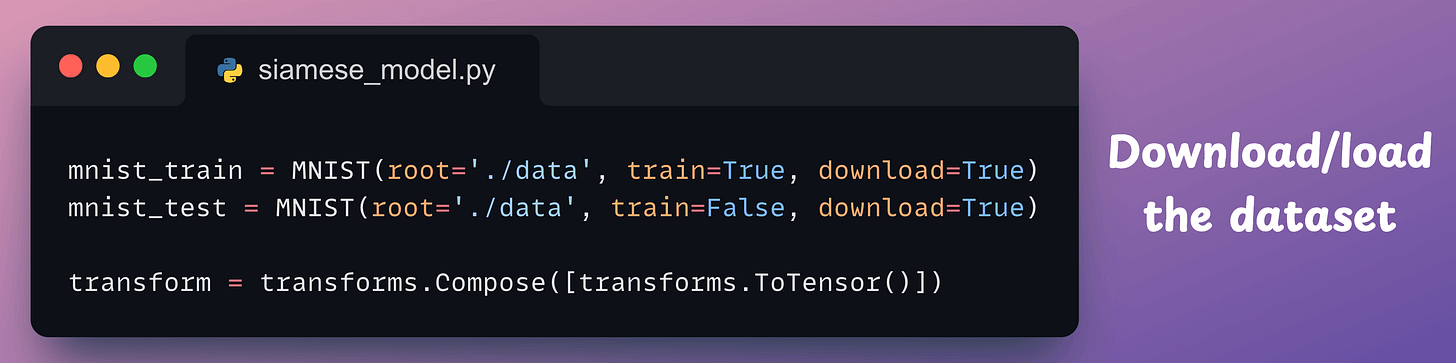
Next, we download/load the MNIST dataset:
Now, recall to build a Siamese network, we have to create image pairs:
To do this, we define a SiameseDataset class that inherits from the Dataset class of PyTorch:

This class will have three methods:
__init__ method: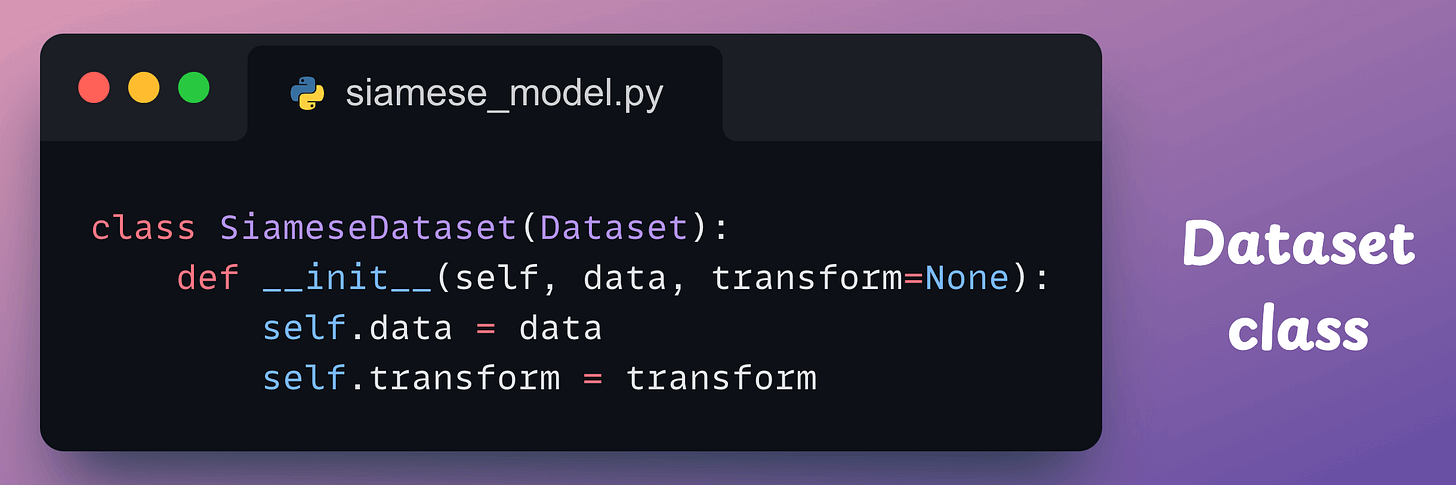
data parameter will be mnist_train and mnist_test defined earlier.__len__ method:
__getitem__ method, which is used to return an instance of the train data. In our case, we shall pair the current instance from the training dataset with:The __getitem__ method is implemented below:
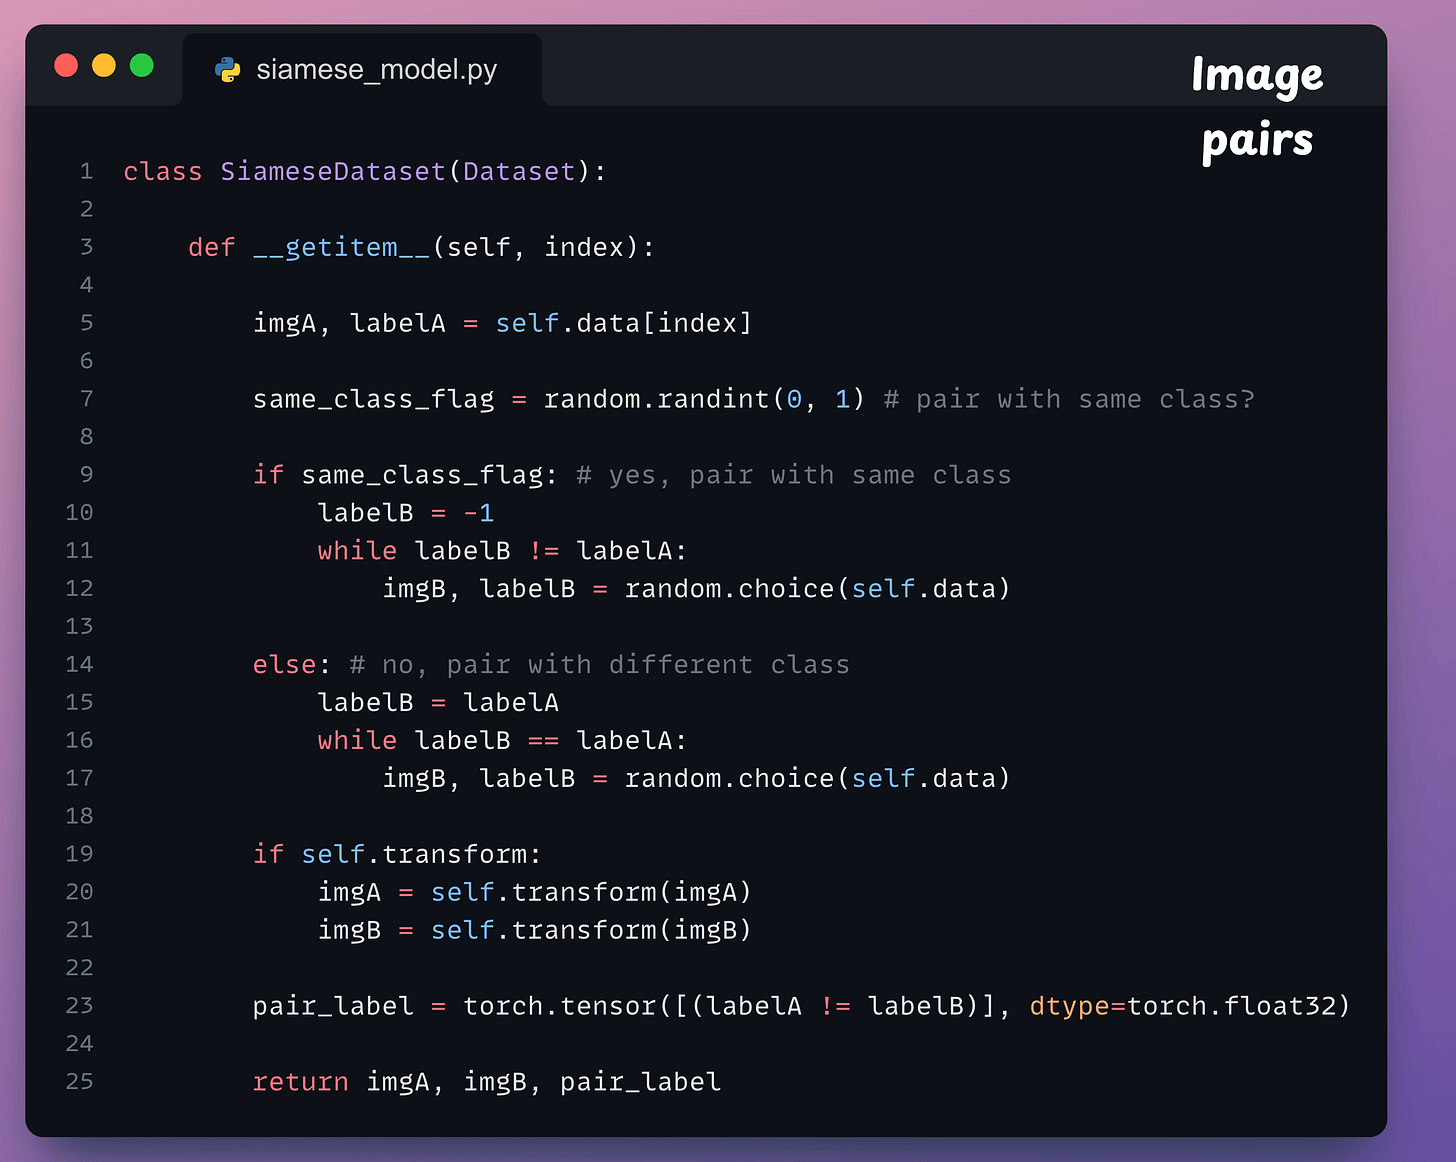
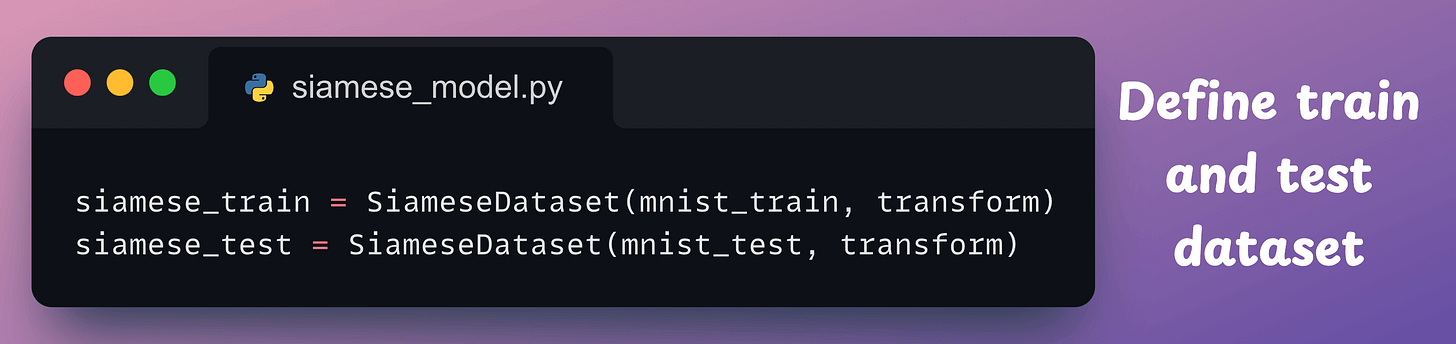
flag=1, continue to find an instance until we get an instance of the same class.flag=0, continue to find an instance until we get an instance of a different class.After defining the class, we create the dataset objects below:
Next, we define the neural network:
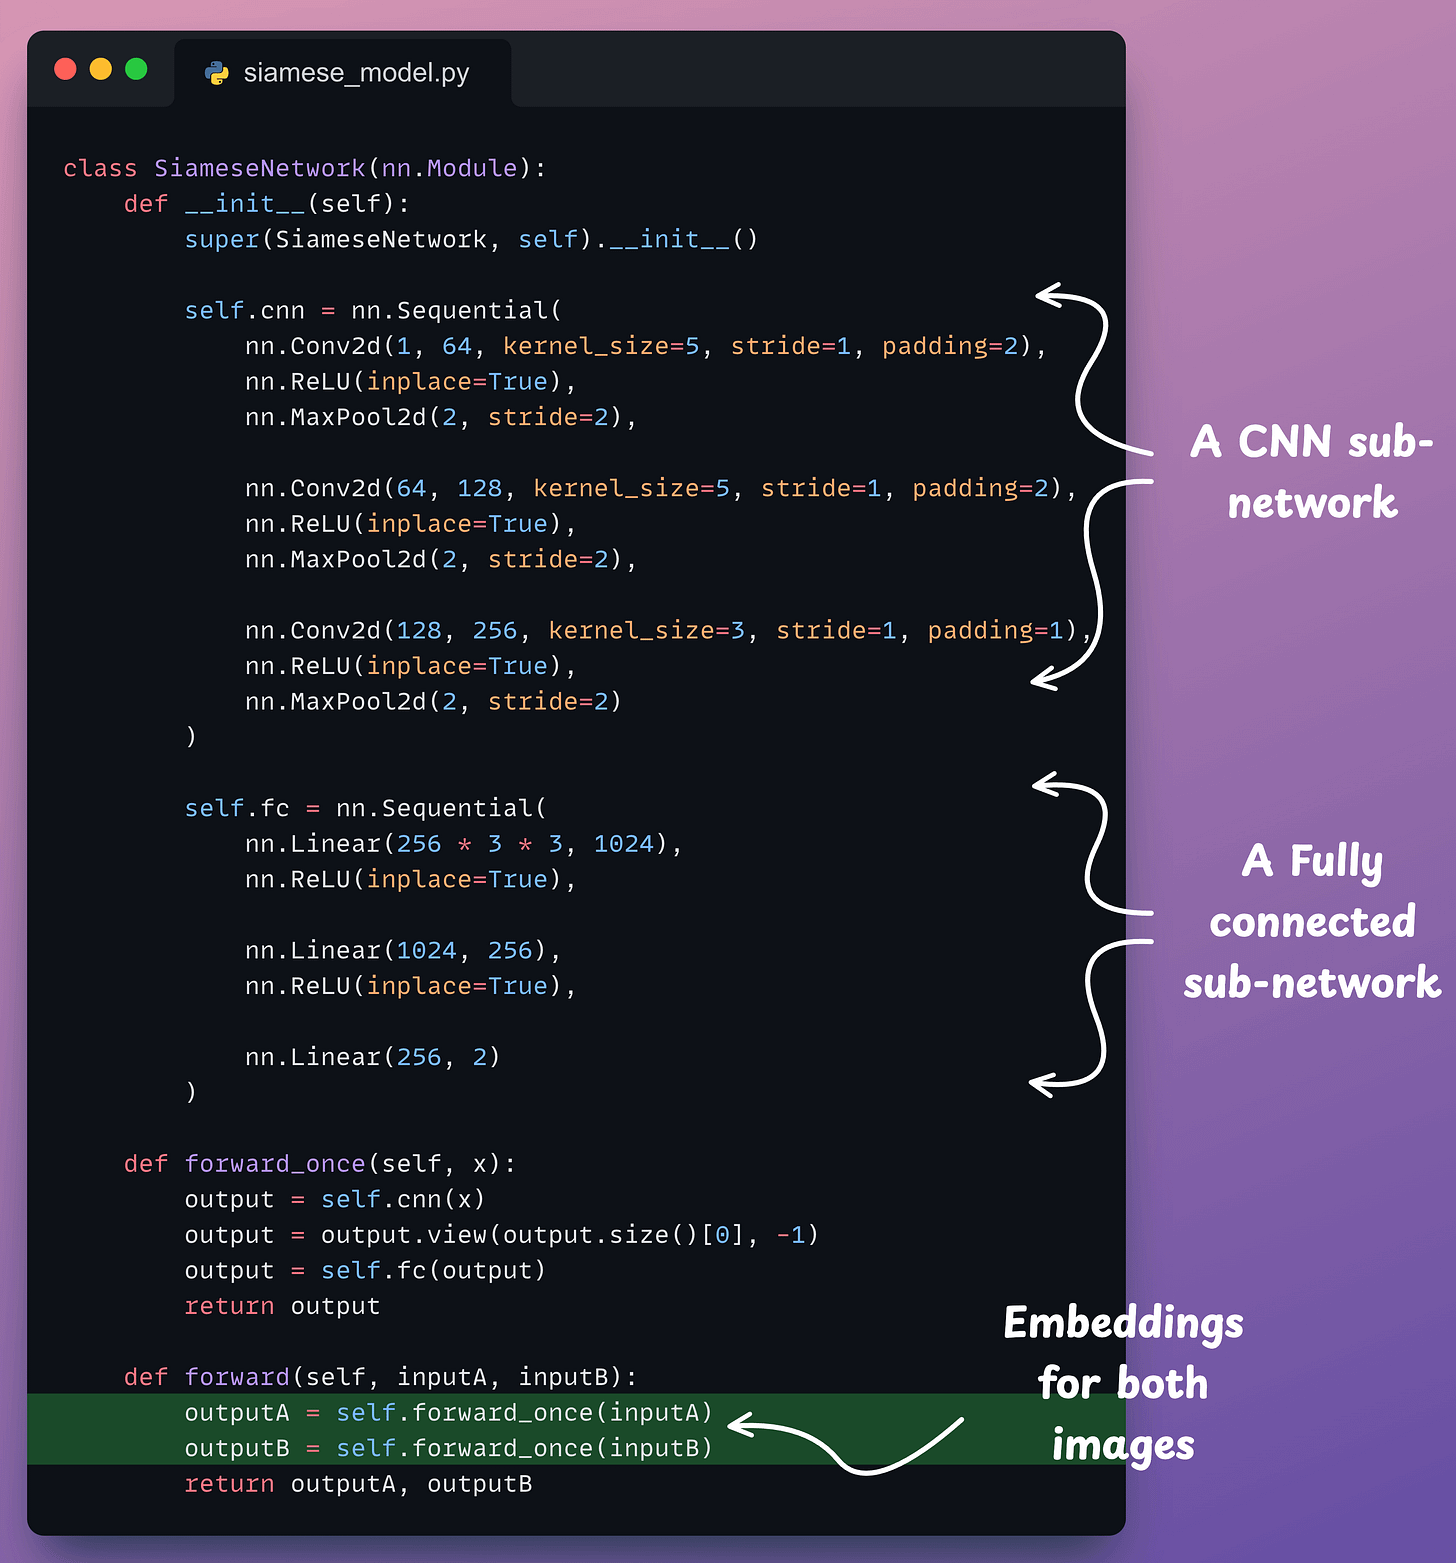
outputA and outputB).Moving on, we define the contrastive loss:

Almost done!
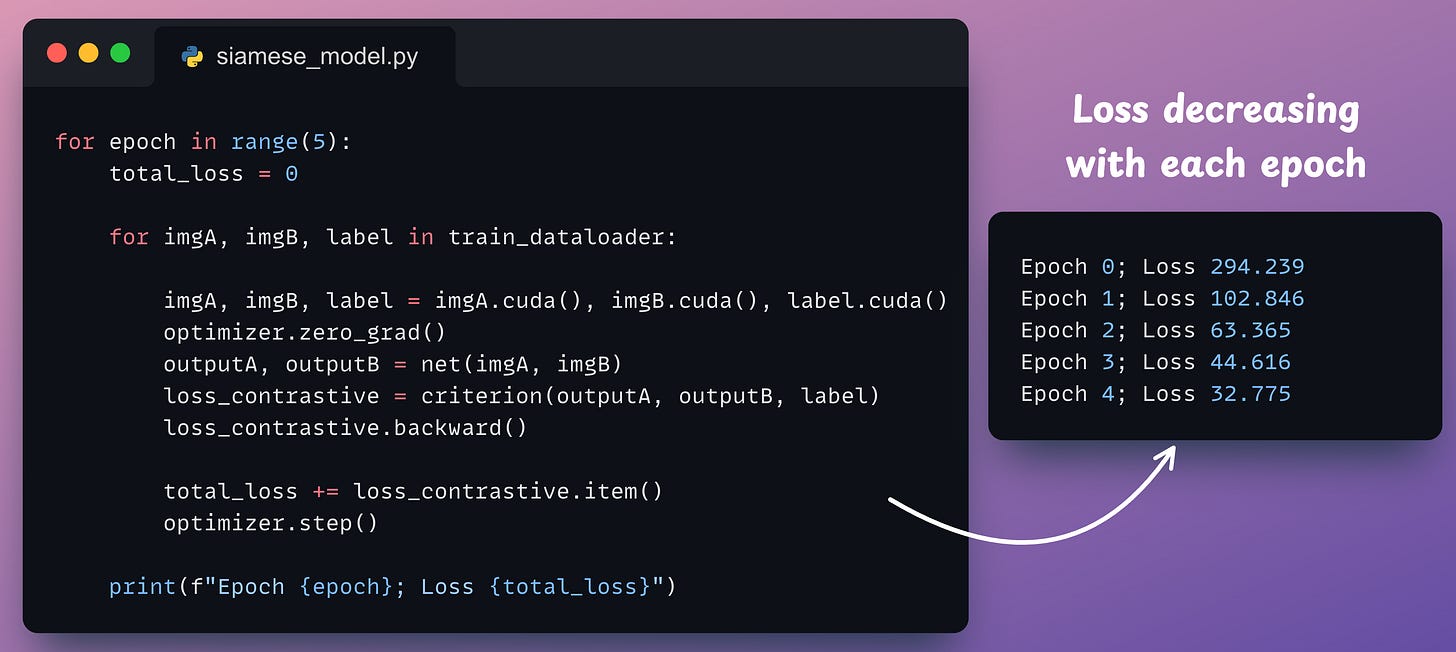
Next, we define the dataloader, the model, the optimizer, and the loss function:

Finally, we train it:
And with that, we have successfully implemented a Siamese Network using PyTorch.
Let’s look at some results using images in the test dataset:
We can generate a similarity score as follows:

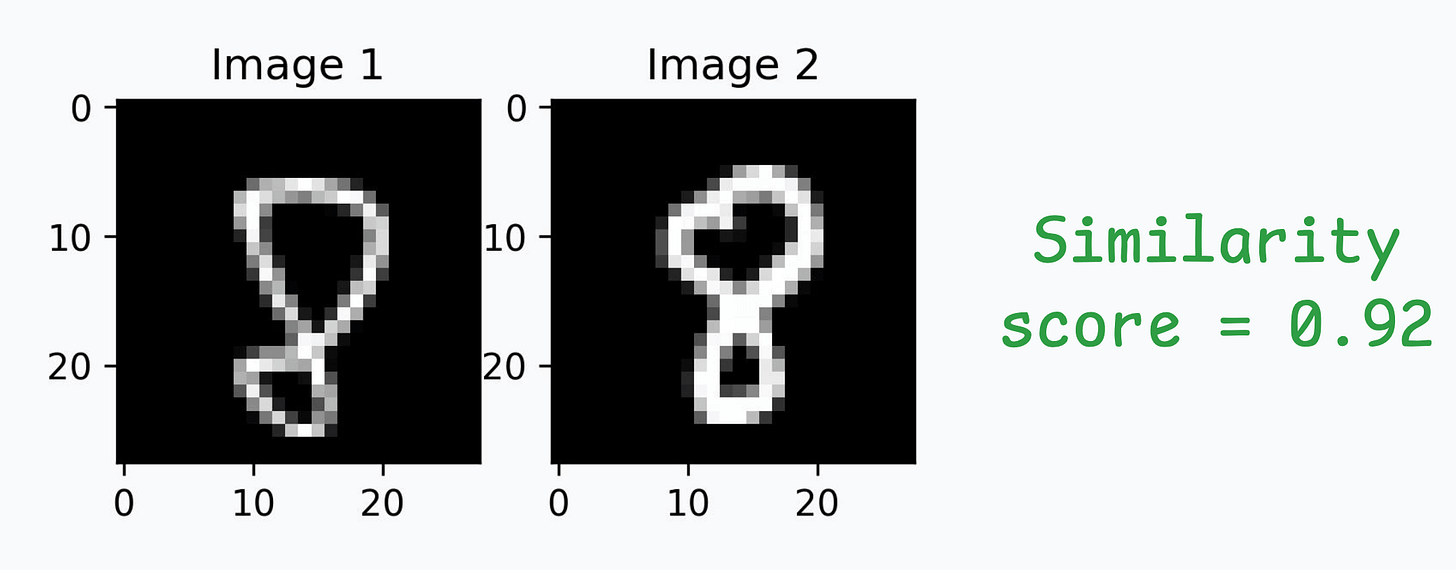
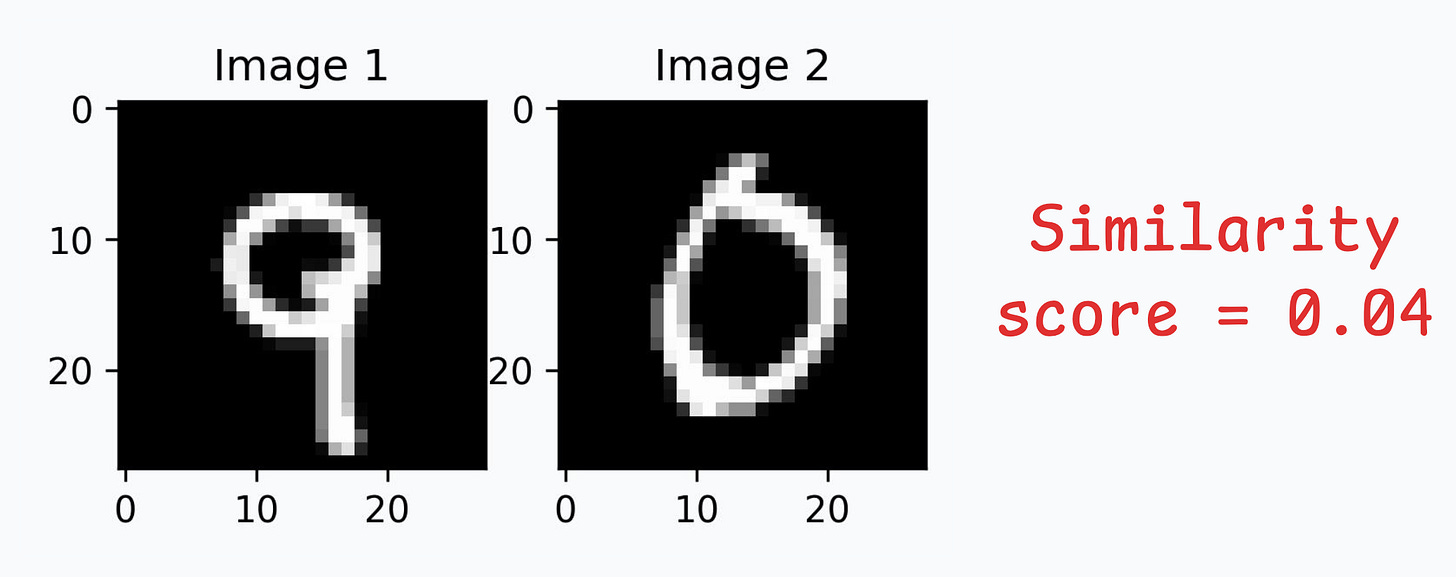
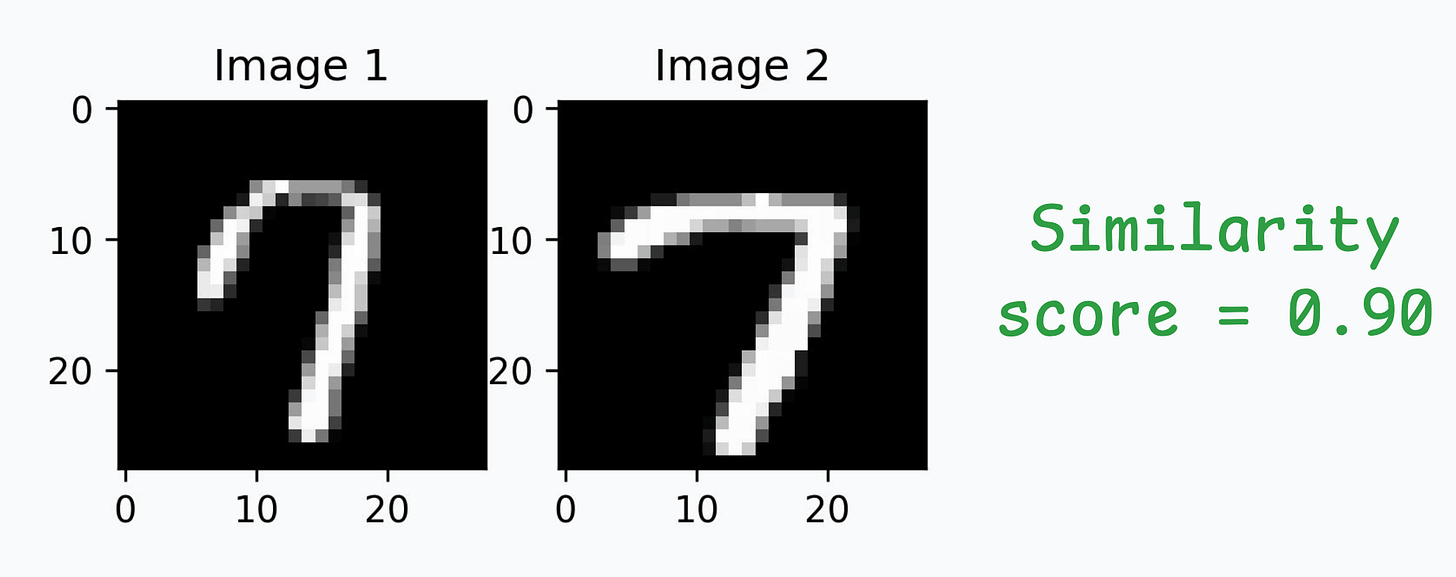
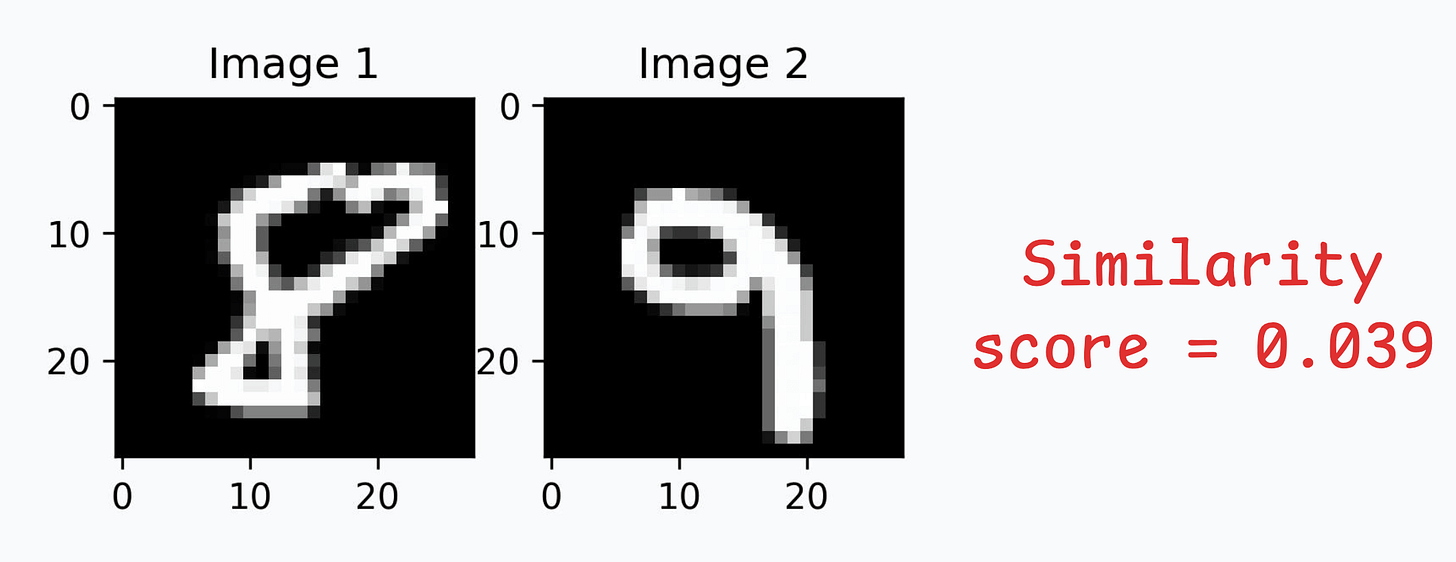
Great, it works as expected!
And with that, we have successfully implemented and verified the predictions of a Siamese Network.
That said, there’s one thing to note.
Since during the data preparation step, we paired the instance either with the same or a different class…
…this inherently meant that this approach demands labeled data.
There are several techniques to get around this, which we shall discuss soon.
👉 In the meantime, it’s over to you: Can you tell how you would handle unlabeled data in this case?
The code for today’s issue is available here: Siamese Network Implementation.
Once a model has been trained, we move to productionizing and deploying it.
If ideas related to production and deployment intimidate you, here’s a quick roadmap for you to upskill (assuming you know how to train a model):
This roadmap should set you up pretty well, even if you have NEVER deployed a single model before since everything is practical and implementation-driven.