5 Must-Know Ways to Test ML Models in Production (Implementation Included)
A beginner-friendly guide to model testing.
Introduction
A typical blueprint of any real-world machine learning (ML) looks like the following:
- Formulate the problem statement
- Get the management’s approval
- Gather the required datasets
- Explore the gathered data
- Start building a model
- Make improvements
- Validate the model
- Test the model
- Improve it
Once you are satisfied:
- Productionize the ideal model
- Proceed with deployment
- Set up logging methods
- Handover the model
- Go back to step 1
Of course, the above process can be a bit more comprehensive, but the overall blueprint from idea inception to handover to the team you built that solution for is almost the same across projects.
Also, in the above process:
- Steps 1-9 mainly highlight development in the local environment.
- Steps 10-13 are inclined towards the production environment.
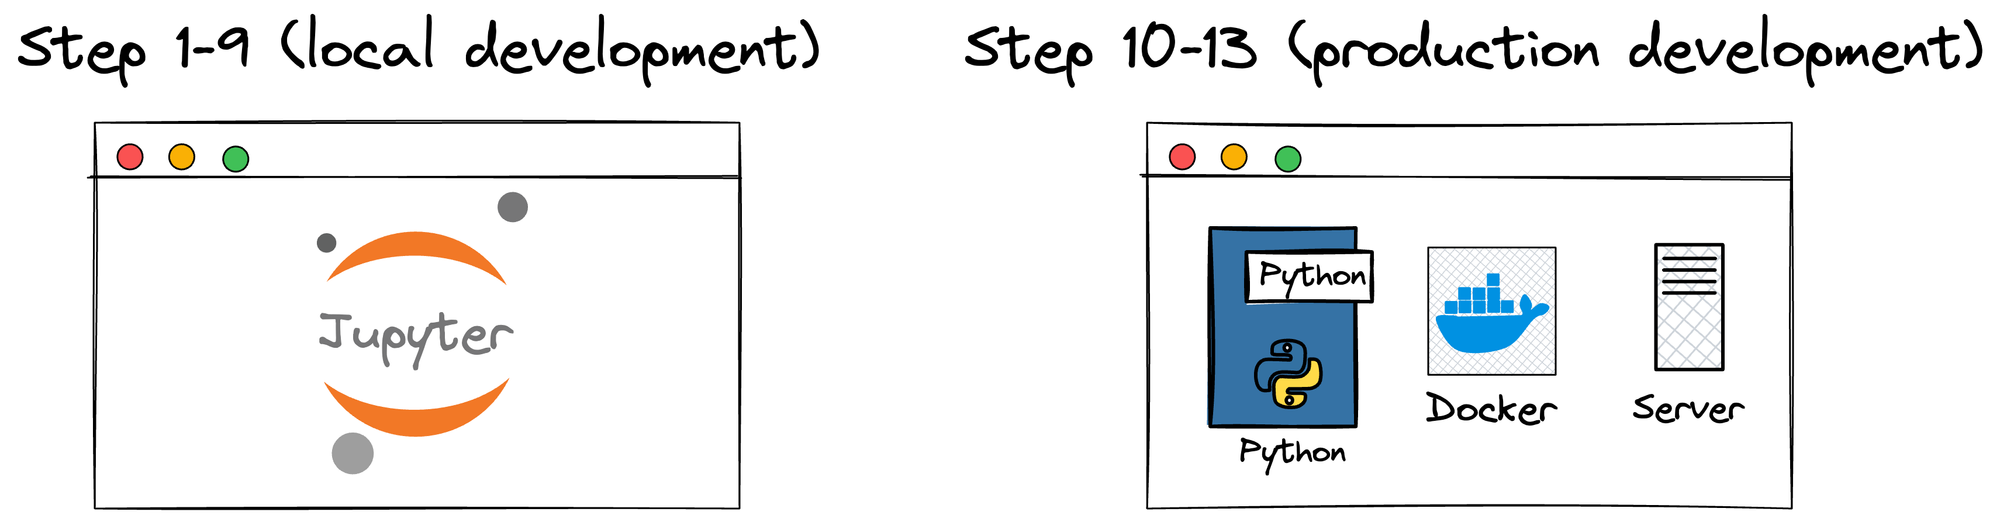
To elaborate further, during the local development phase (steps 1-9), the model goes through rigorous engineering and testing to ensure its accuracy, robustness, and generalizability. We do this all the time.
Testing using validation/test sets is critical in this phase as it helps identify and rectify any issues before the model is sent for productionisation (which demands considerable engineering efforts).
What is productionisation?
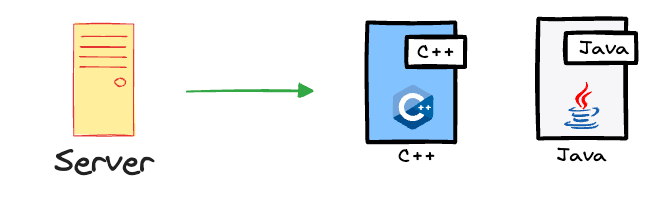
For more context, productionisation is the phase where an ideal model is prepared for deployment in a production setting.
For instance, if we developed the model in Python, but the server we intend to deploy our model on runs any other language except Python, like C++ or Java, then making it compatible with such environment configuration is what productionisation involves.
We discussed this here in the following article (you can read it after this article):
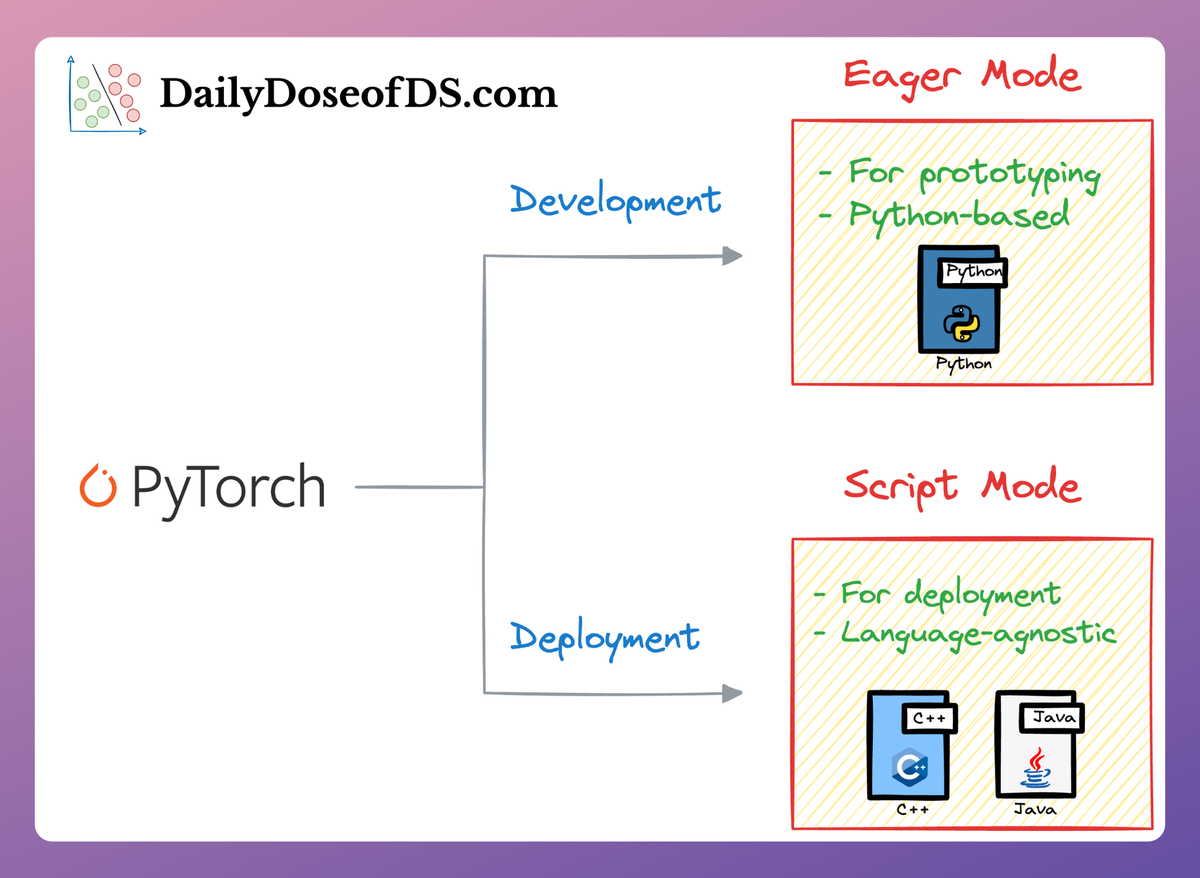
This article discussed the use of TorchScript, which we can use to convert Python-developed PyTorch models into formats that are compatible with other languages.
Moreover, it's possible that we leveraged some classical ML models from sklearn. But these models are not production-friendly because sklearn is built on top of NumPy, which can only run on a single core of a CPU.

As a result, it provides sub-optimal performance.
The techniques we discussed in the following article help us make these models more production-friendly (you can read it after this article):
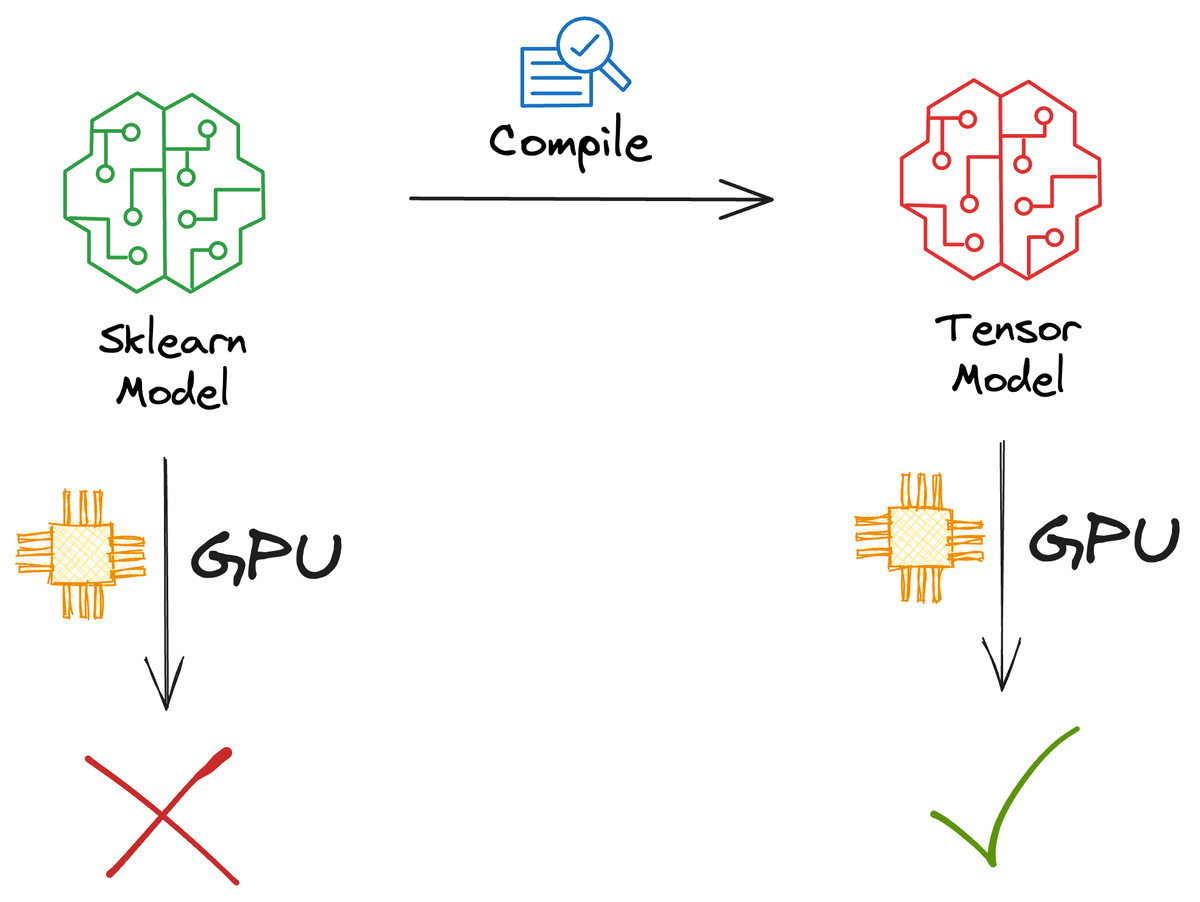
This article discussed techniques to convert sklearn models to tensor computations, which can be parallelized and can also be loaded on a GPU (if needed)
One more example could be that if the model is to be deployed on edge devices, we may want to reduce its size (discussed below).

In a nutshell, the two primary objectives of the productionisation phase are to optimize the model for deployment and ensure its robustness and reliability.
This involves testing the model against various edge cases and scenarios to ensure that it can handle unexpected inputs and situations gracefully.
Once the model is fully productionised, it is deployed to the production environment, where it begins to serve predictions to end-users or other systems.
Project over?
Not yet!
Ideal deployment strategy
If we already have a model running in production, it could be a terrible idea to instantly replace the previous model with the updated model.
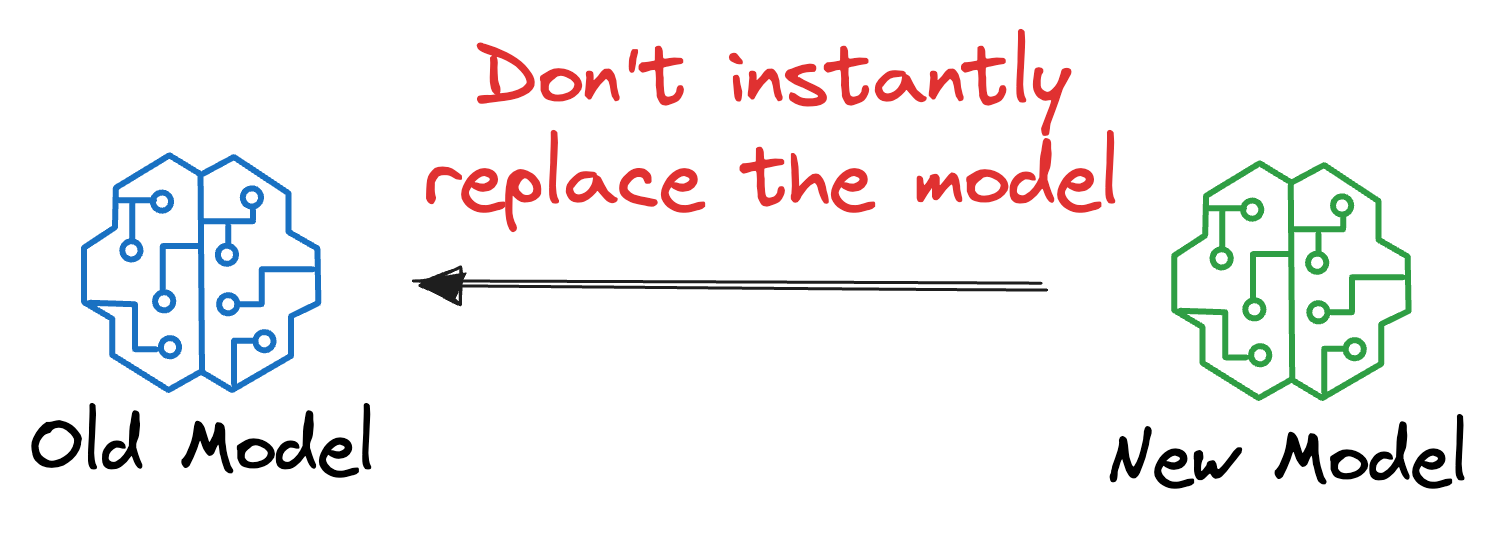
Instead, a more conservative and reliable strategy is to test the model in production (yes, on real-world incoming data) before completely substituting/discarding the previous version of the model.
Testing a model in production might appear risky, but ML teams do it all the time, and it isn't that complicated.
In the upcoming section, we shall discuss five commonly used techniques to test ML models in production.
We shall also implement these strategies, and in order to do that, we shall be using Modelbit, which we discussed in the following article:
It’s okay if you haven’t read it yet. We will do a quick overview of the model deployment steps in Modelbit.
Let’s begin!
Modelbit deployment demo
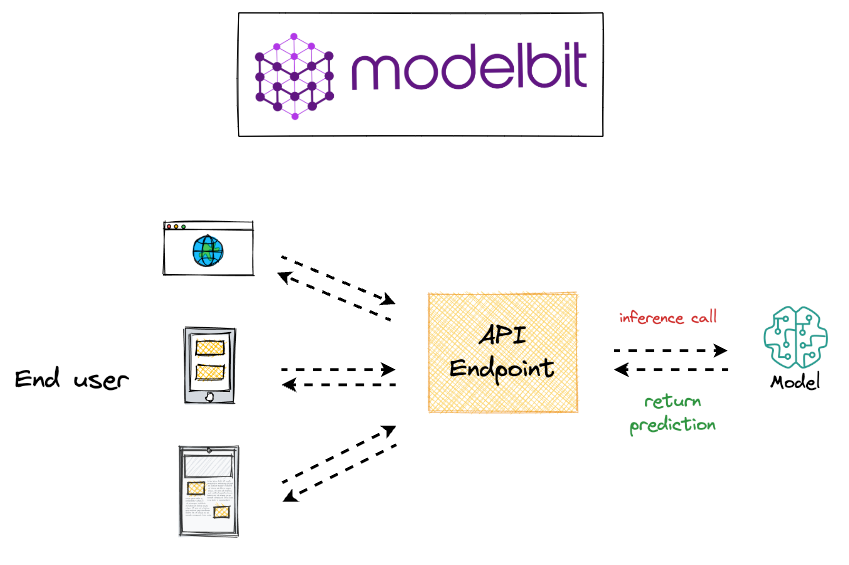
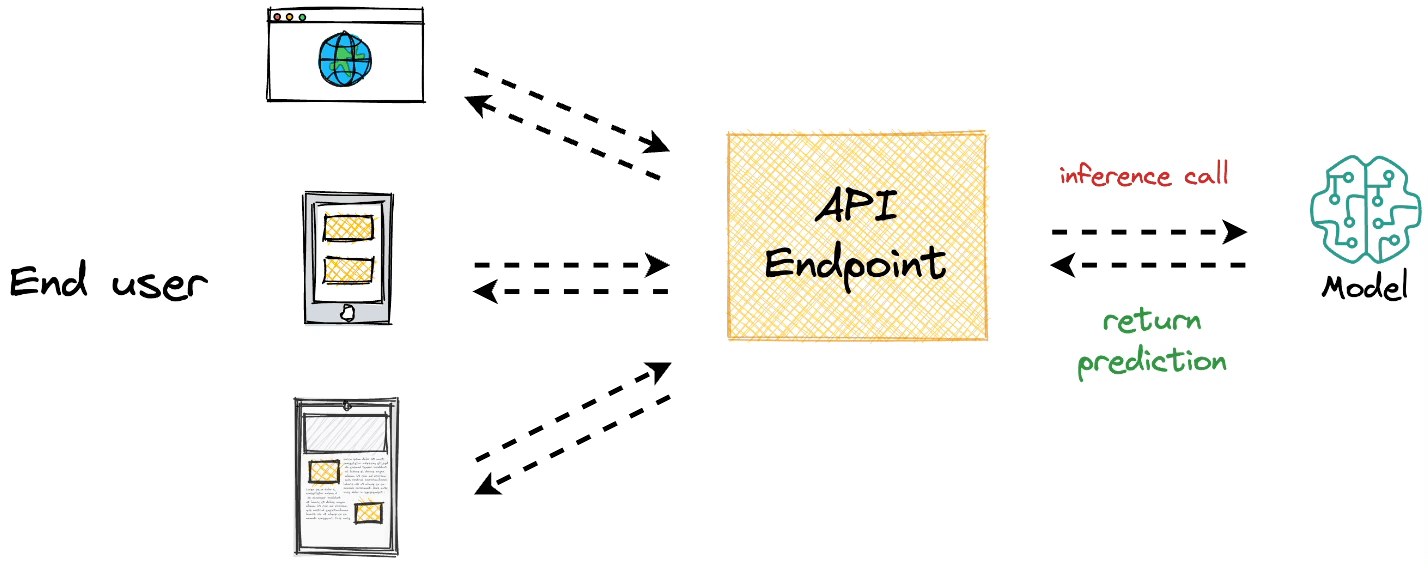
The core objective behind model deployment is to obtain an API endpoint for our deployed model, which can be later used for inference purposes:
Modelbit lets us seamlessly deploy ML models directly from our Python notebooks (or Git, as we would see ahead in this article) and obtain a REST API.
Process workflow
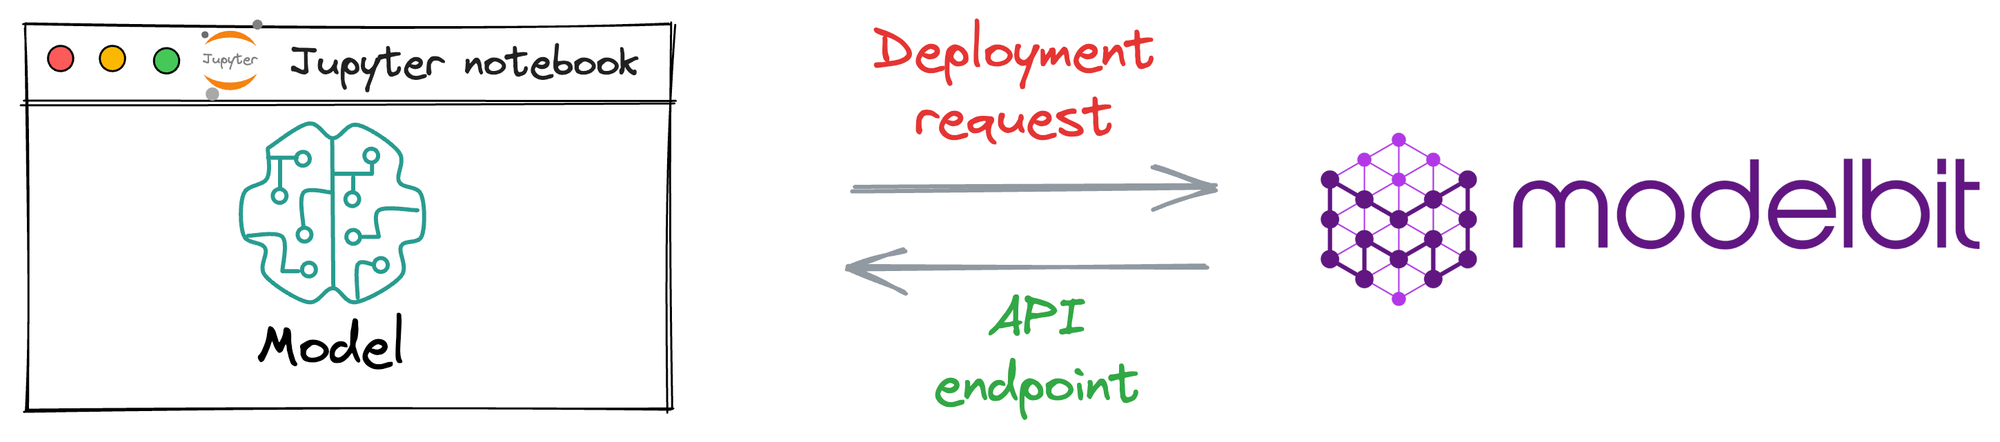
Since Modelbit is a relatively new service, let’s understand the general workflow to generate an API endpoint when deploying a model with Modelbit.
The image below depicts the steps involved in deploying models with Modelbit:
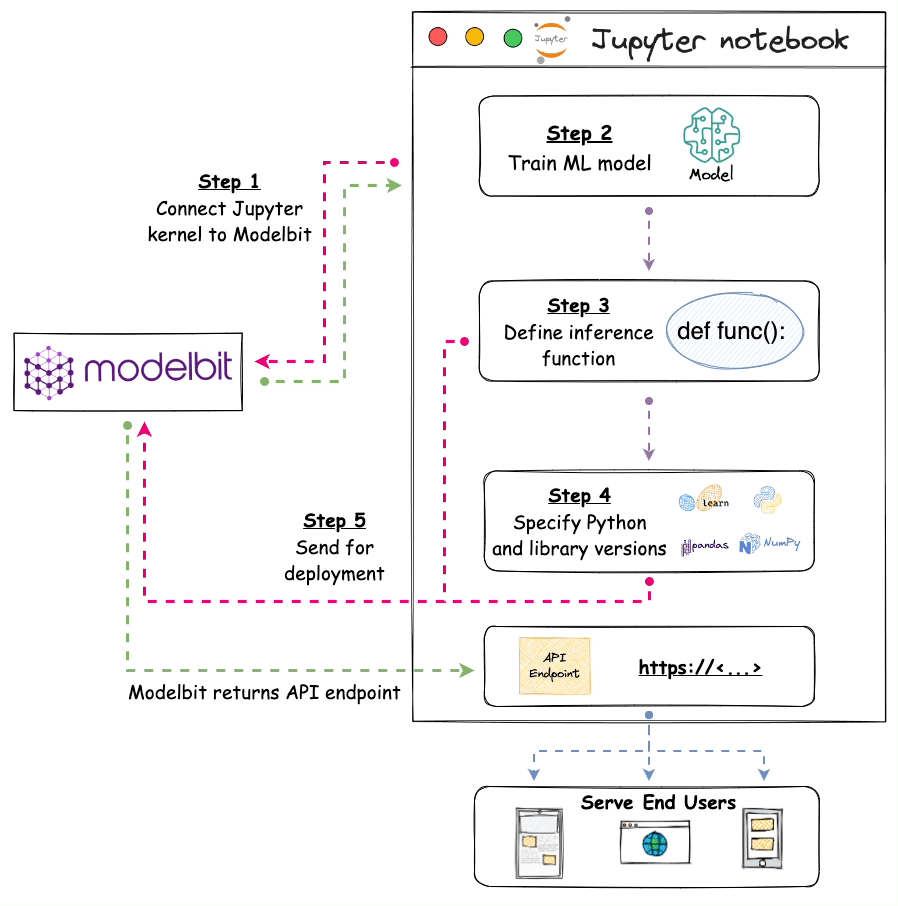
- Step 1) We connect the Jupyter kernel to Modelbit.
- Step 2) Next, we train the ML model.
- Step 3) We define the inference function. Simply put, this function contains the code that will be executed at inference. Thus, it will be responsible for returning the prediction.
- Step 4) [OPTIONAL] Here, we specify the version of Python and other open-source libraries we used while training the model.
- Step 5) Lastly, we send it for deployment.
Once done, Modelbit returns the API endpoint, which we can integrate into any of the applications and serve end-users with.
Let’s implement this!
Prerequisites
First, we must install the Modelbit package first.
We can use pip to install the Modelbit package:
Done!
Also, to deploy and view our deployed models in the Modelbit dashboard, we must create a Modelbit account as well here: https://app.modelbit.com/signup.
Now, we can implement the steps depicted in the earlier animation.
Step 1) Connect Jupyter kernel to Modelbit
First, we connect our Jupyter kernel to Modelbit. This is done as follows: