Testing and Security in MCP
MCP Part 6: An overview of testing using the MCP Inspector, and a discussion of common vulnerabilities, mitigation strategies, and MCP Roots.
Recap
Before we dive into Part 6 of the MCP crash course, let’s briefly recap what we covered in the previous part of this course.
In Part 5, we explored sampling, which is one of the most powerful capabilities of MCP. Sampling enables servers to request completions from the client’s language model, effectively reversing the usual flow of control.
Here's the diagram that breaks down the sampling workflow:
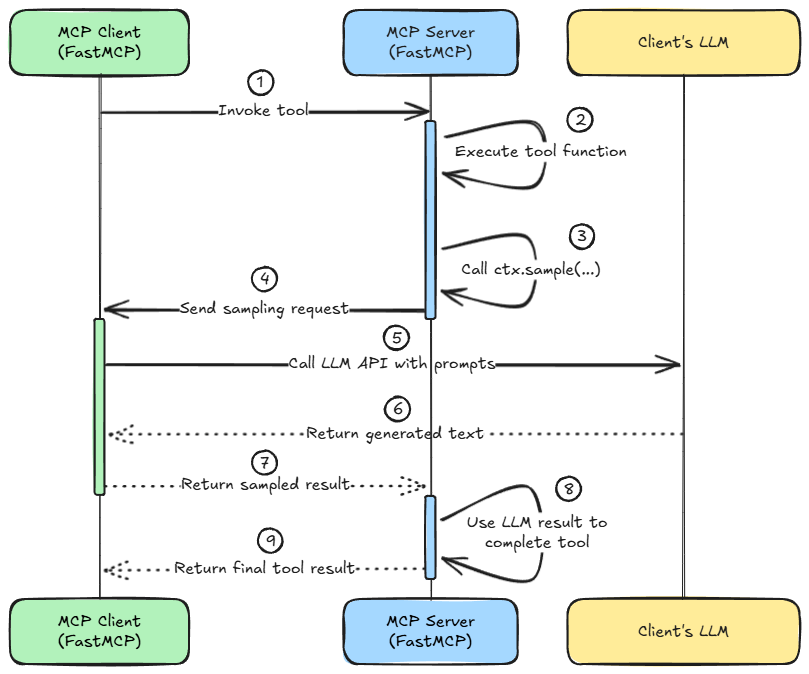
More specifically, we understood how sampling gives MCP servers the ability to delegate partial reasoning to the client, enabling collaborative, LLM-assisted execution.
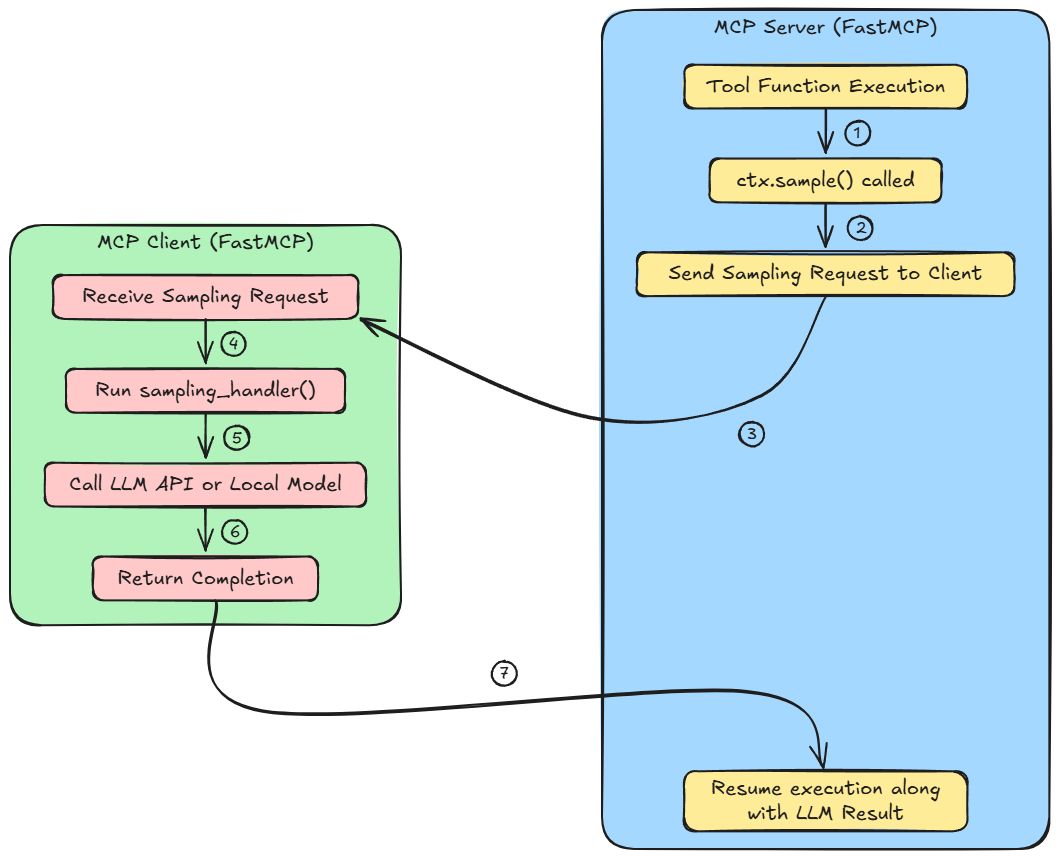
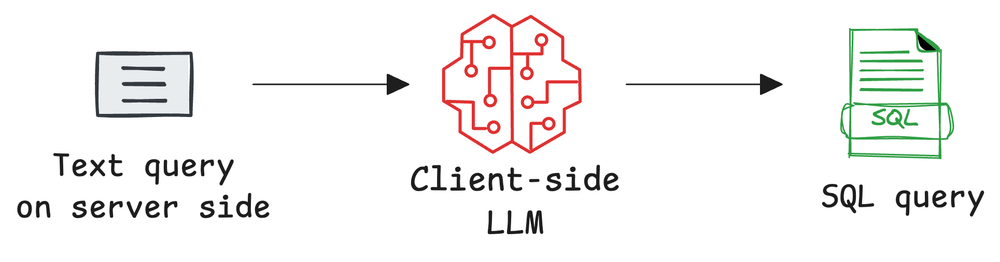
We built custom sampling handlers on the client side, configured model preferences, and explored practical use cases of LLM sampling such as text summarization, natural language to SQL conversion, and Q&A analysis.
While writing server functions to discussing fallback chains and error handling, we learned how sampling sits at the intersection of orchestration and reasoning, and why it's key to building adaptive, intelligent systems.
By the end of Part 5, we had the blueprint for end-to-end cooperative intelligence that involved tool execution from the server and LLM completions from the client.
If you haven’t studied Part 5 yet, we strongly recommend going through it first. You can read it below:
What's in this part
In this chapter and across the next one, we shall move a step ahead and tackle one of the most essential yet often overlooked aspects of building real-world systems: testing, security, and sandboxing.
So far, we’ve seen how clients can trigger tools, sample from LLMs, and orchestrate multi-step logic. But what happens when your server has to handle unsafe inputs, run third-party tools, or execute user-controlled logic?
How do you validate behavior and ensure safety?
That’s precisely what this chapter covers.
We’ll explore how not just to execute logic, but also to test, secure, and contain that logic so systems can operate safely in open-ended, unpredictable environments.
In this part, we’ll explore:
- What is testing in MCP, and how does the MCP Inspector help?
- Significance of security in MCP systems
- The key vulnerabilities in MCP
- Real-world threats like prompt injection, tool poisoning, server impersonation, and excessive capability exposure.
- How to define and enforce boundaries using MCP roots.
- Possible solutions to address the key threats
Each topic will be backed by examples and walkthroughs so you not only understand the theory, but can also implement it confidently in your own stack.
In Part 7, we’ll continue our journey by introducing Docker-based sandboxing, showing how to containerize your server for runtime security and seamless local deployments across Claude Desktop, Cursor IDE, and custom clients.
- What is sandboxing and why it’s critical?
- Fully containerizing a FastMCP server using Docker
- How to enforce runtime limits and security boundaries with Docker flags?
- How to connect Claude Desktop, Cursor, and custom clients to sandboxed containers?
As always, every concept will be backed by concrete examples, walkthroughs, and practical tips to help you master both the idea and the implementation.
Let’s begin!
Testing MCP servers using MCP Inspector
The MCP Inspector is a tool built specifically for testing and debugging MCP servers. It provides a web-based interface to interact with your server, see available tools, send test inputs, and verify results in real-time.
It’s especially useful for testing server-side implementations without needing to connect to a client-side LLM or applications like Claude or Cursor, allowing you to validate behaviors without incurring any LLM-related costs.
By design, the MCP Inspector can work with any MCP server transport.
Launching MCP Inspector and interacting with server
The easiest way to run the Inspector is using npx (Node’s package runner), which fetches it from NPM (Node's package manager). You don’t need to clone any repo. Just ensure you have the latest Node.js (v22 or later) installed on your system.
To download and set up Node.js on your system based on your operating system, check out the official installation guide linked below:

Or you can watch video tutorials as per your OS:
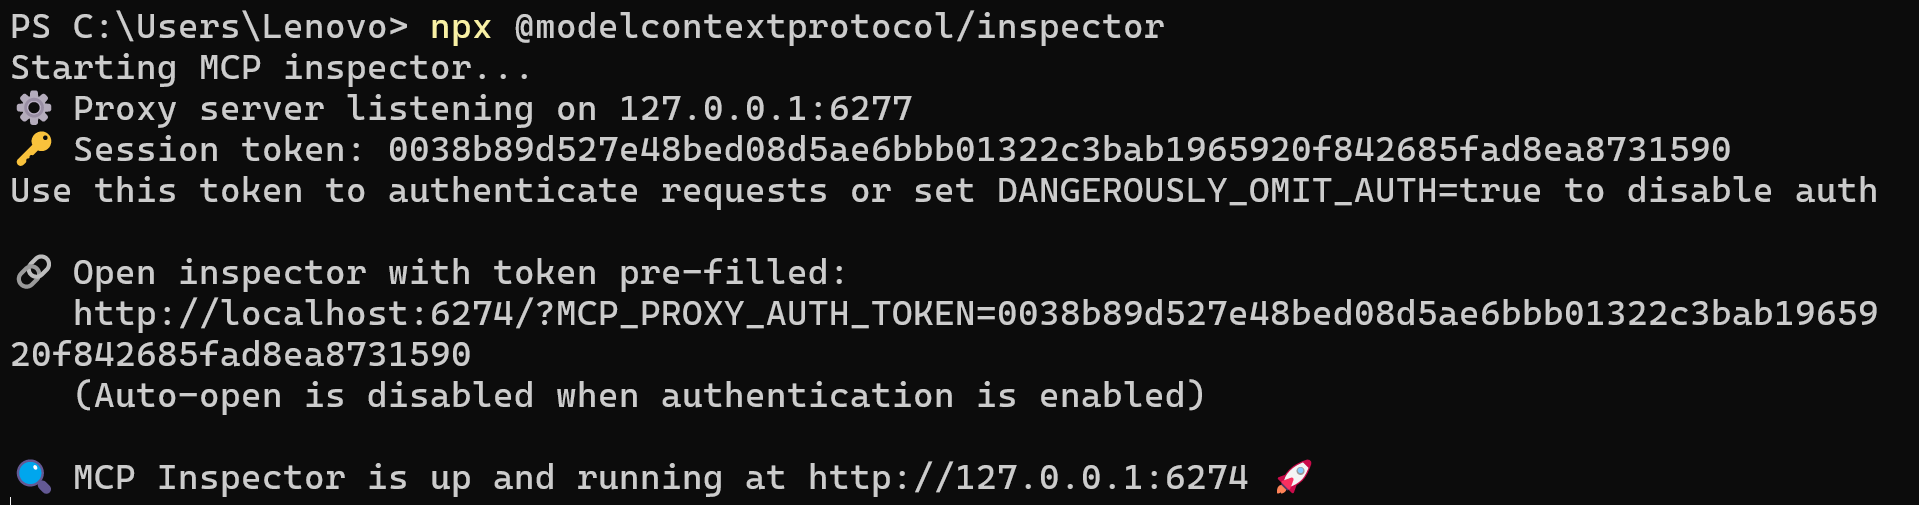
Once we have Node.js up and running, launch the MCP Inspector with:
The first time we run this command, it will download and launch the MCP Inspector. On subsequent runs, it will start it directly.
By default, it will launch the web UI on http://localhost:6274 or http://127.0.0.1:6274 (port 6274). You’ll see a message in the terminal once it’s running, leave this terminal open and the command running. You'll be seeing something like:
Now, open the MCP Inspector in your browser using the address displayed in the CLI, which includes a prefilled session token like http://localhost:6274/?MCP_PROXY_AUTH_TOKEN=<token> :
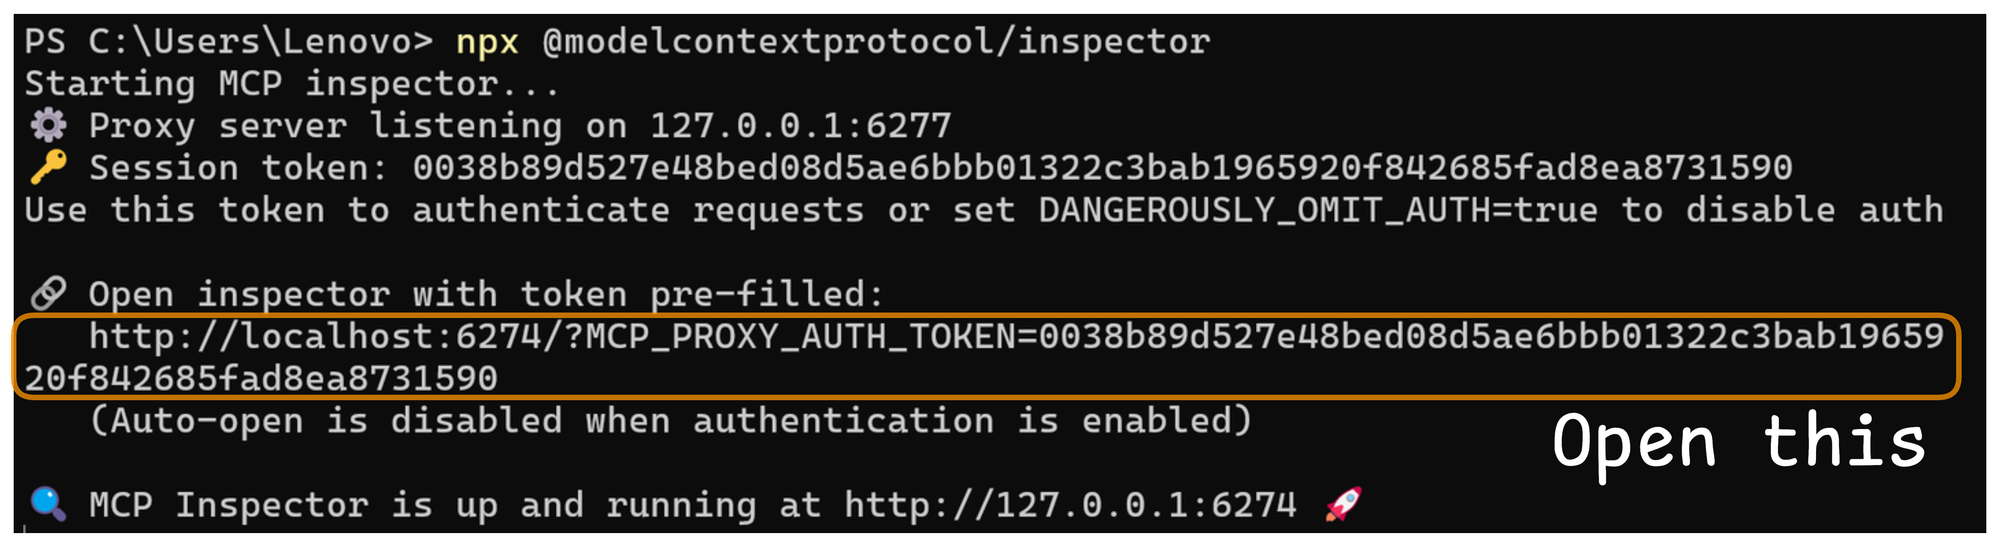
This will take you directly to the MCP Inspector interface.
Next, we need to connect to our server.
As a reference, we'll be using our server script from the last part (sampling) of the course here:
In the UI, you’ll have options to connect to an MCP server. There’s a dropdown to select transport. Check out the screenshot below:
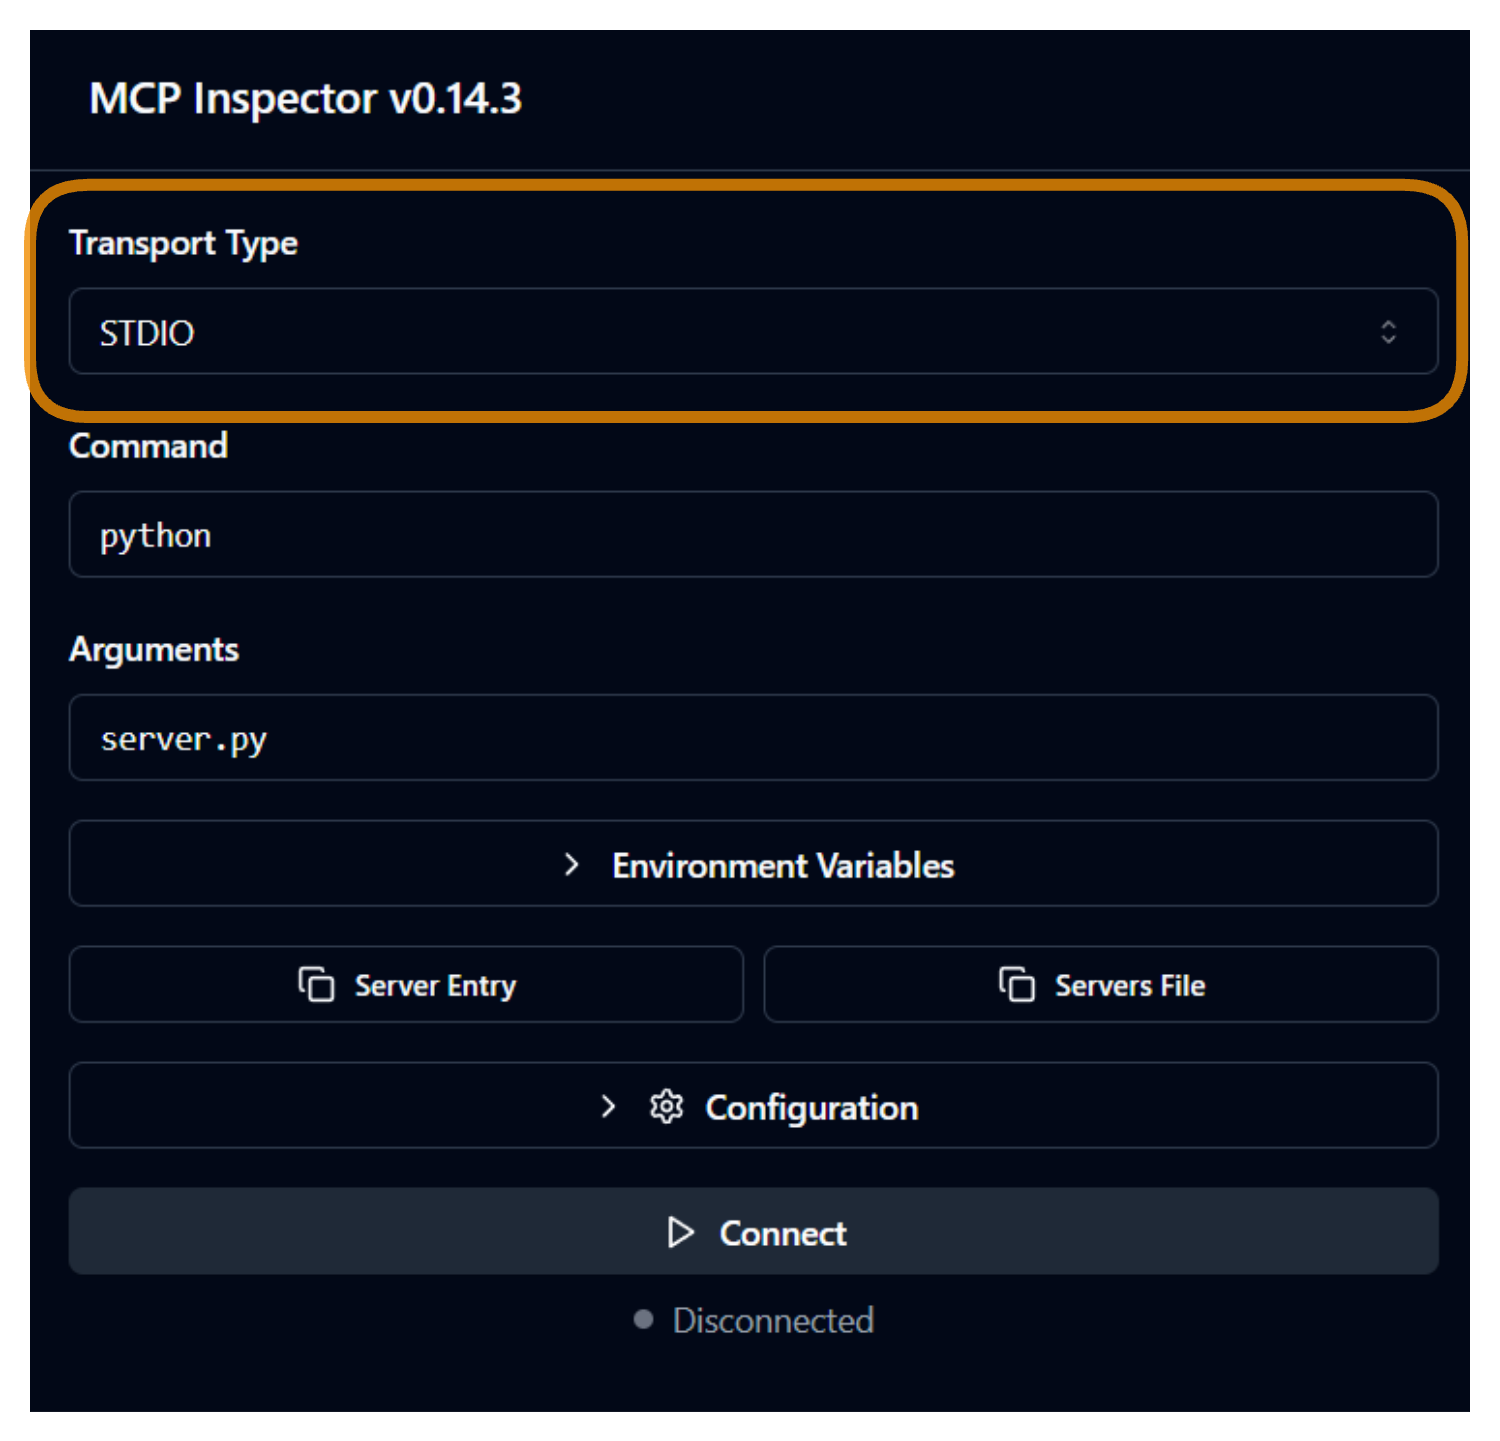
We need to select the transport method based on our server configuration. If using STDIO, provide the full file path of the server script, or just the file name if the MCP Inspector was launched from the project directory. Our reference server uses stdio transport hence we'll use Transport Type as STDIO.
In case of SSE, i.e., mcp.run(transport="sse", host="127.0.0.1", port=8000), we need to select transport type as SSE and specify the server's URL: