Building a Custom MCP Client
MCP Part 3: A step-by-step and from scratch implementation of the MCP client, plus a comparative overview of how MCP differs from both API and function calling.
Recap
Before we dive further into this MCP course, let’s take a moment to reflect on what we have learned so far.
In part 1, we laid the conceptual foundation of the model context protocol (MCP). We discussed the core problem MCP solves: the M×N integration issue, where each new model-tool pairing would previously require custom glue code. MCP breaks that pattern with a unified, standardized interface.

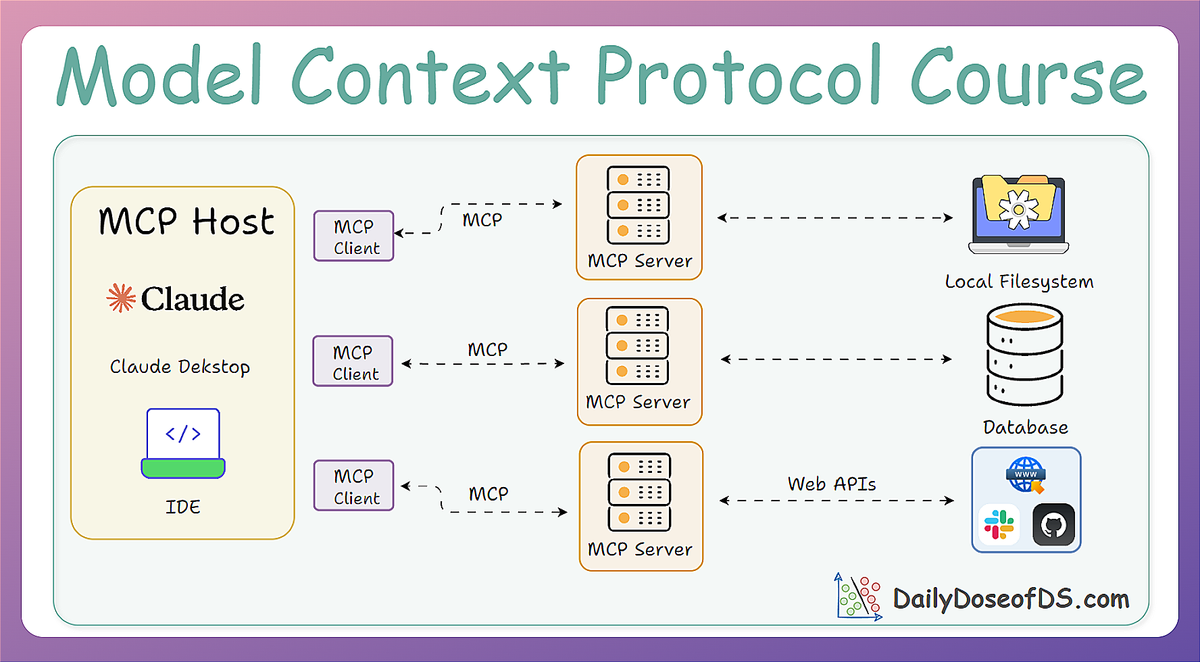
We also thoroughly explored the MCP architecture: the Host, the Client, and the Server. This modular design lets AI assistants plug into multiple tools and data sources without manual rework.

In part 2, we got to know about capabilities, like tools, resources, and prompts, and also saw how AI models dynamically use these building blocks to reason, fetch data, perform actions, and adapt on the fly.
We understood how the client-server capability exchange works, and why MCP is a game-changer for dynamic tool integration, through hands-on examples.
If you haven’t yet gone through the previous parts, we strongly recommend doing that first before you read further. It’ll give you the necessary grounding to fully benefit from what’s coming next. Find them here:


In this part, we’ll shift our focus toward a more practical implementation and bring clarity to several key ideas and concepts covered so far in the first two parts.
By the end of this part, we will have a concrete understanding of:
- How to build a custom MCP client, and not rely on prebuilt solutions like Cursor or Claude.
- What the full MCP lifecycle looks like in action.
- The true nature of MCP as a client-server architecture, as revealed through practical integration.
- How MCP differs from traditional API and function calling, illustrated through hands-on implementations.
As always, everything will be assisted with intuitive examples and code.
Let's begin!
Building an MCP client
To truly understand how the model context protocol (MCP) works, and to integrate it into our own applications, we’re now going to build a custom MCP client.
To recap, an MCP Client is a component within the Host that handles the low-level communication with an MCP Server.
Think of the Client as the adapter or messenger. While the Host decides what to do, the Client knows how to speak MCP to actually carry out those instructions with the server.
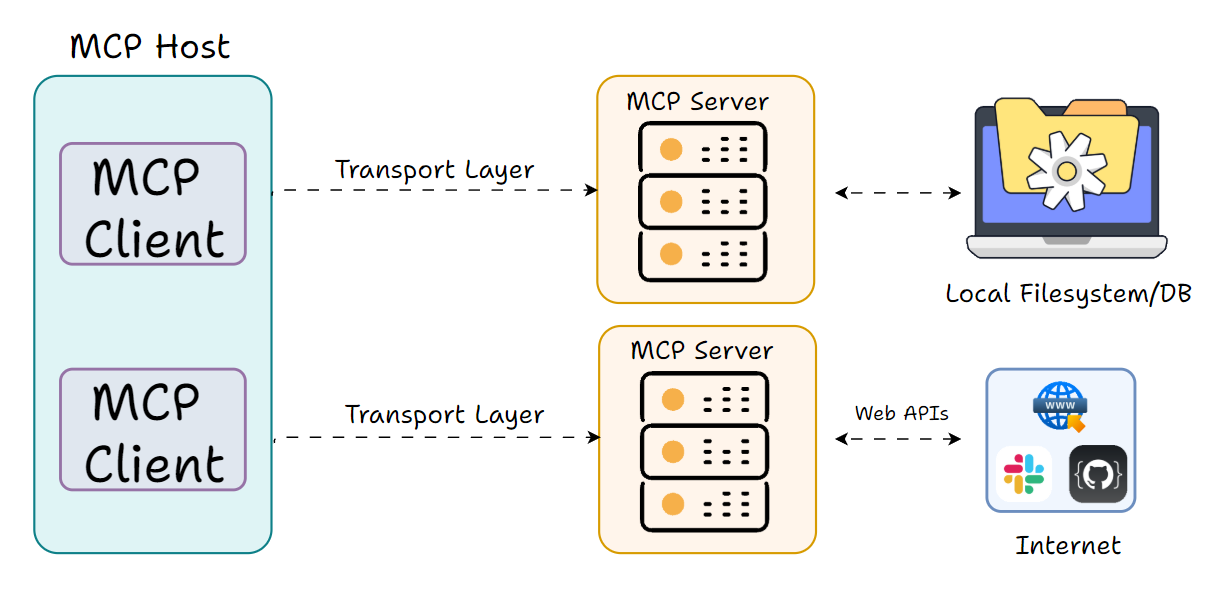
Each MCP Client manages a 1:1 connection to a single MCP Server. If your Host app connects to multiple servers, it will instantiate multiple Client instances, one per server. The Client takes care of tasks like:
- sending the appropriate MCP requests
- listening for responses or notifications
- handling errors or timeouts
- ensuring the protocol rules are followed
It’s essentially the MCP protocol driver inside your app.
The Client role may sound a bit abstract, but a useful way to picture it is to compare it to a web browser’s networking layer.
The browser (host) wants to fetch data from various websites; it creates HTTP client connections behind the scenes to communicate with each website’s server.
In our process of implementation, this client will:
- Connect to an MCP server.
- Forward user queries to an LLM.
- Handle tool calls made by the model.
- Return the final response to the user.
We’ll be using Python for our implementation, and we’ll walk through each step in detail.
To implement a basic mockup MCP client (without involving an LLM yet), we’ll need to install a few core dependencies:
To keep things consistent, we’ll use the same sample server code from the previous part for our demonstration:
Here’s the server setup we’ll be working with (create a server.py file and add this code):
In the above code, we have created an MCP server with two tools:
get_weather, which, for the sake of simplicity, just returns a dummy response but we can make it practical by integrating a weather API.calculate, which calculates the result of a mathematical expression.convert_currency, which converts a given amount from one currency to another.
To run this server under sse transport, simply change the mcp.run() line to:
This transport is used for remote or long-running services, often over a network or cloud.
On a side note, you can download the code for this whole article along with a full readme notebook with step-by-step instructions below.
It contains a few Python files and a notebook file:
Download below: